Welcome to the DBXR463ED1WW Repair Manual, a comprehensive guide for understanding and fixing your GE electric dryer. Designed for both DIY enthusiasts and professionals, this manual provides detailed insights into troubleshooting, repair steps, and maintenance tips. Whether you’re addressing common issues like a dryer that won’t start or noisy operation, this resource equips you with the knowledge to restore your appliance to optimal performance. Explore the sections below for step-by-step instructions, wiring diagrams, and essential tools needed to ensure a successful repair.
Overview of the DBXR463ED1WW Repair Manual
The DBXR463ED1WW Repair Manual is a detailed guide offering comprehensive solutions for troubleshooting and fixing your GE electric dryer. It includes parts diagrams, troubleshooting tips, and step-by-step repair instructions to address common issues like a dryer that won’t start, noisy operation, or insufficient heat. Designed for both DIY enthusiasts and professionals, the manual provides clear instructions for disassembling and reassembling the dryer, along with maintenance tips to ensure optimal performance. Use this resource to identify and resolve problems efficiently, restoring your appliance to its original functionality;
Safety Precautions
Always unplug the dryer before starting repairs. Wear protective gloves and safety glasses. Avoid working near open flames or sparks. Handle sharp edges with care.
Essential Safety Tips for DIY Repairs
Always disconnect the dryer from power before starting repairs. Wear protective gloves and safety glasses to prevent injuries. Ensure the workspace is well-ventilated and free from flammable materials. Avoid wearing loose clothing that could get caught in moving parts. Handle sharp edges and electrical components with extreme care. Never bypass safety features or skip precautions outlined in the manual. Keep children and pets away from the repair area. Use proper tools designed for the task to avoid damaging components or causing accidents. Prioritize caution when working with electrical systems to prevent shocks or fires.
Structure of the Manual
This manual is organized into clear sections, including safety tips, tools needed, component access, electrical insights, common issues, troubleshooting, repair guides, and maintenance advice for easy navigation.
Navigating the Repair Guide
This manual is designed to be user-friendly, with clear headings and sections to help you quickly find the information you need. Use the table of contents to navigate through topics such as safety precautions, troubleshooting, and repair guides. Each section includes detailed instructions, diagrams, and lists to simplify complex tasks. Bullet points and bold headings highlight key steps and important safety tips. For easy reference, wiring diagrams and part lists are included to help you identify and replace components efficiently. This guide ensures a seamless repair experience, whether you’re a novice or an experienced DIYer.
Tools and Materials Needed
Essential tools include screwdrivers, wrenches, pliers, and voltage testers. Materials needed are replacement parts, adhesives, and fasteners. Use a work light for better visibility and wear protective gloves.
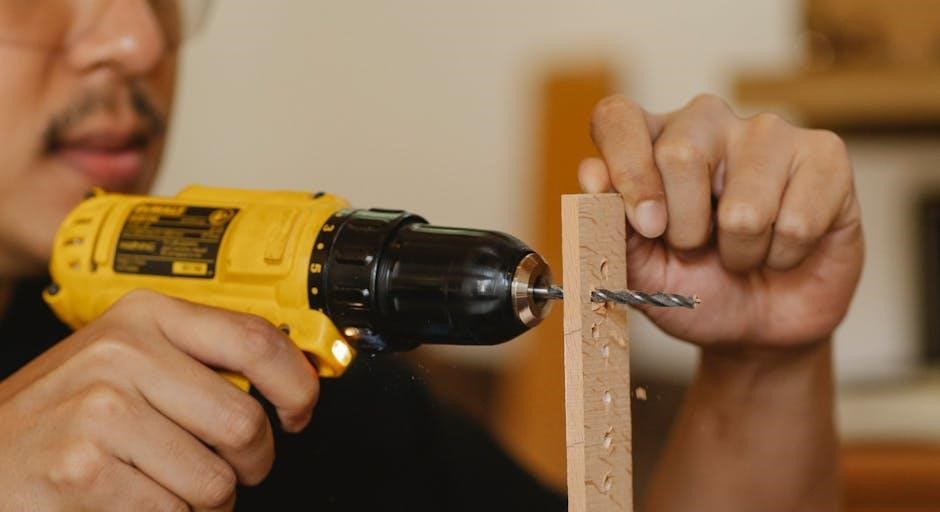
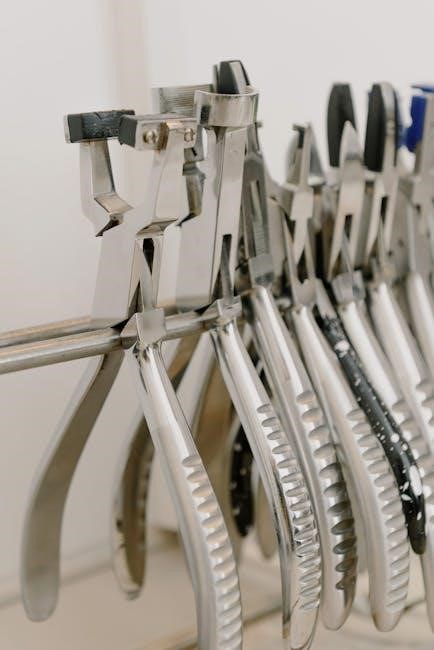
Essential Tools for Effective Repair
To effectively repair your GE DBXR463ED1WW dryer, gather the following tools: a Phillips screwdriver, Torx screwdriver, wrench set, pliers, and a voltage tester. Additionally, materials like replacement belts, fuses, and thermal cutoffs may be required. A work light can provide better visibility, and protective gloves ensure safety. Organize your tools in a workstation to streamline the process. Refer to the wiring diagrams for specific component locations. Ensure all parts are compatible with your model to avoid further issues. Proper preparation is key to a successful repair.

Accessing Components
Accessing components in your GE DBXR463ED1WW dryer involves removing the top and front panels. Disconnect electrical connections and take safety precautions. Refer to the manual for specific steps and component locations to avoid damage.
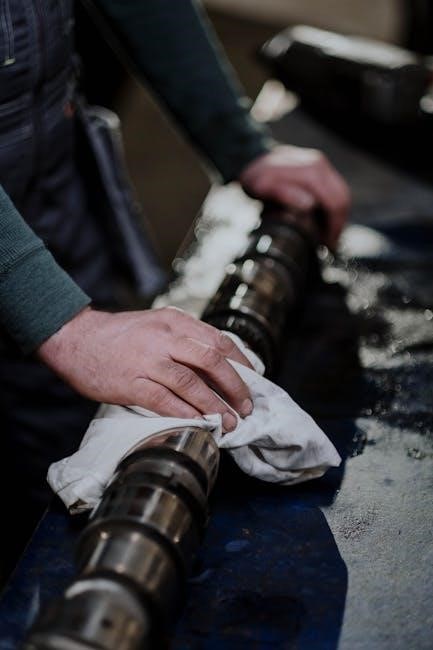
How to Safely Access Internal Parts
To safely access internal parts of your GE DBXR463ED1WW dryer, start by disconnecting the power supply. Remove the top panel using a screwdriver, then carefully take off the front panel to expose the internal components. Refer to the wiring diagram in the manual to identify key parts. Wear protective gloves and ensure all electrical connections are secure before proceeding. This method ensures safe and efficient access for repairs or maintenance.
Understanding Electrical Components
The DBXR463ED1WW dryer features key electrical parts like the heating element, thermostats, and sensors. These components work together to regulate heat and ensure safe operation. Refer to the wiring diagram in the manual for a detailed overview of connections and functions.
Key Electrical Parts and Their Functions
The DBXR463ED1WW dryer’s electrical system includes a heating element, thermostats, sensors, and a control board. The heating element generates heat, while thermostats regulate temperature to prevent overheating. Sensors monitor moisture, temperature, and drum rotation, ensuring efficient operation. The control board manages power distribution and operation sequences. Understanding these components is essential for diagnosing issues like no heat or improper drying. Refer to the wiring diagram in the manual for connections and troubleshooting guidance.

Common Issues
The most common issues with the DBXR463ED1WW dryer include no heat, loud noise, and failure to start. These problems can often be resolved with DIY repairs.
Dryer Won’t Start
If your DBXR463ED1WW dryer fails to start, it could be due to a faulty start switch, broken door switch, or issues with the control board. Check the power supply and ensure the outlet is functioning. Verify that the dryer door is closing properly, as an open door can prevent operation. Consult the troubleshooting section of the manual for step-by-step diagnostic guidance. Replace defective components as needed, following the repair instructions provided in the manual. Addressing these issues early can prevent further damage and ensure reliable operation.
Noisy Operation
A noisy dryer can be caused by worn drum rollers, a faulty motor, or a loose belt. Inspect the drum rollers and belt for signs of wear or damage. Replace any defective parts using the repair guides in the manual. Ensure all internal components are securely fastened to prevent vibration. If the noise persists, check the dryer’s balance and leveling. Proper maintenance, such as cleaning lint buildup and lubricating moving parts, can also reduce noise. Refer to the troubleshooting section for detailed diagnostic steps and solutions to restore quiet operation.
No Heat or Insufficient Heat
If your dryer produces no heat or insufficient heat, the issue may stem from a faulty heating element, a blown thermal fuse, or a malfunctioning igniter. Check the power supply to ensure the dryer is receiving the correct voltage. Inspect the heating element for visible damage or wear. A blown thermal fuse, often caused by overheating, will need to be replaced. Consult the troubleshooting guide in the manual for detailed diagnostic steps. Replace any defective parts and ensure proper airflow by cleaning the venting system. Regular maintenance can help prevent such issues from recurring.

Troubleshooting
Troubleshooting your DBXR463ED1WW dryer involves identifying symptoms, checking electrical components, and referring to wiring diagrams. Common issues include no heat, noise, and poor performance. Follow the guide for solutions.
Using the Troubleshooting Guide
To effectively use the troubleshooting guide for your DBXR463ED1WW dryer, start by identifying the specific symptom your appliance is experiencing. Common issues include the dryer not starting, noisy operation, or insufficient heat. Refer to the guide’s detailed list of symptoms and match your observation to the closest description. Once identified, consult the corresponding section for potential causes, such as faulty thermostats, blocked vents, or defective heating elements. Use the provided wiring diagrams to locate and test components. Follow the step-by-step repair instructions to resolve the issue safely and efficiently. Always prioritize safety when working with electrical components.
Interpreting Wiring Diagrams
Wiring diagrams in the DBXR463ED1WW repair manual provide a visual representation of the dryer’s electrical circuitry. These diagrams use symbols and color-coded lines to depict components, connections, and power flow. Start by identifying the main components, such as the control board, heating element, and sensors. Use the legend or key provided to understand each symbol. Trace the circuits systematically to diagnose issues like faulty thermostats or broken wires. Cross-reference the wiring diagram with the troubleshooting guide to pinpoint electrical faults and ensure safe, accurate repairs.
Repair Guides
This section provides detailed, step-by-step instructions for disassembling, diagnosing, and repairing key components of your DBXR463ED1WW dryer, ensuring safe and effective fixes for common issues.
Step-by-Step Disassembly
Start by unplugging the dryer and removing the top panel using a screwdriver. Next, disconnect the door switch and carefully detach the front panel to access internal components. Remove the drum belt and take out the drum to reach the motor, heating element, and other critical parts. Use the provided diagrams to identify and label wiring connections before proceeding. Follow the manual’s instructions to safely disassemble each section, ensuring all screws and clips are removed properly. Reassembly will require reversing these steps, so keep track of all parts and fasteners for a smooth process.
Replacing Defective Parts
Identify the defective part using the troubleshooting guide or wiring diagrams provided in the manual. Once located, refer to the parts diagram to ensure the correct replacement component is ordered. Use original equipment manufacturer (OEM) parts for reliability. When replacing, carefully disconnect electrical connections and remove fasteners securing the faulty part. Install the new part in reverse order, ensuring proper alignment and tightening. Double-check all connections and test the dryer to confirm the issue is resolved. Regularly updating worn or damaged parts will extend the dryer’s lifespan and maintain performance.
Reassembling the Dryer
Reassembling the dryer requires careful attention to ensure all components are properly aligned and secured. Begin by reversing the disassembly steps, starting with the internal parts. Ensure all electrical connections are securely reattached and wires are properly routed. Reinstall panels and covers, tightening screws firmly but avoiding overtightening. Once reassembled, test the dryer to confirm all functions operate correctly. Refer to the manual for specific guidance on aligning parts and ensuring safety. Proper reassembly is crucial for restoring the dryer’s performance and preventing future issues.
Maintenance Tips
Regular maintenance is key to ensuring your dryer operates efficiently. Clean the lint filter after each use, inspect venting systems for blockages, and check electrical connections for wear. These simple practices help prevent common issues and ensure optimal performance and safety;
Regular Maintenance for Optimal Performance
Regular maintenance is essential to ensure your GE DBXR463ED1WW dryer operates efficiently and safely. Start by cleaning the lint filter after every use to improve airflow and reduce fire risks. Additionally, inspect and clean the venting system regularly to prevent blockages that can lead to poor performance or overheating. Check electrical connections for wear or damage and ensure the dryer is properly leveled to avoid vibrations. Schedule periodic checks of belts, rollers, and seals for signs of wear. By following these maintenance routines, you can extend the lifespan of your dryer, prevent common issues, and ensure reliable operation.
This concludes the DBXR463ED1WW repair manual. We hope this guide has empowered you to diagnose and resolve issues confidently. For future reference, remember to perform regular maintenance to keep your dryer running smoothly. Happy repairing!
Final Thoughts and Next Steps
With the DBXR463ED1WW repair manual as your guide, you’re now equipped to tackle common issues and perform effective repairs. Remember to always prioritize safety and use genuine parts for optimal results. If you’re unsure about a step, consult the troubleshooting guide or seek professional assistance. Regular maintenance, such as cleaning vents and checking belts, will extend your dryer’s lifespan. For further support, explore repair videos, diagrams, and expert advice on platforms like RepairClinic or PartSelect. Confidence in your abilities will ensure a successful repair experience.